[Next.JS] 데이터 추가, 수정, 삭제

🖥️ 데이터 추가하기
create 버튼을 눌러 /create 페이지로 이동해 title과 body를 작성한다.
1. 입력폼 만들기
// create/page.js

export default function Create() {
  return (
    <form>
      <p>
        <input type="text" name="title" placeholder="title" />
      </p>
      <p>
        <textarea name="body" placeholder="body" />
      </p>
      <p>
        <input type="submit" value="create" />
      </p>
    </form>
  );
}
2. 폼 제출하기
onSubmit 이벤트를 사용해 사용자의 입력을 받아 제출하는 동작을 수행해야한다.
=> 클라이언트 컴포넌트로 구현
"use client";
title과 body에 입력된 값을 담아 POST 요청을 보낸다.
서버는 json-server로 만든 서버를 사용한다.
fetch로 POST 요청을 보낼 때는 options를 추가한다.
- method
- headers -> 콘텐츠 타입 정의
- body -> 전송할 데이터. 통신 시 string 형태의 JSON으로 전송
<form
  onSubmit={(e) => {
    e.preventDefault();
    const title = e.target.title.value;
    const body = e.target.body.value;
    const options = {
      method: "POST",
      headers: {
        "Content-Type": "application/json",
      },
      body: JSON.stringify({ title, body }),
    };
    fetch("http://localhost:9999/topics", options)
      .then((res) => res.json()) // JSON 데이터를 JavaScript로 변환
      .then((result) => {
        console.log(result);
      });
  }}
>
이벤트가 실행되면 기본 값으로 새로 고침이 발생한다.
새로 고침을 막기 위해 e.preventDefault를 작성한다.
result를 콘솔창에 찍으면
{title: 'a', body: 'a', id: 8}id가 추가로 생성되어 들어갔다.
3. 전송 후 페이지 이동하기
데이터를 생성한 후 read/id 페이지로 리다이렉트 동작을 수행한다.
데이터의 id를 세그먼트로 사용해 read 페이지로 이동한다.
페이지 이동은 useRouter 훅을 사용해 push 메소드로 이동할 페이지 주소를 넘겨 구현했다.
⚠️ useRouter는 'next/router'가 아닌 'next/navigation'에서 가져온다. ⚠️
(next/router는 12버전에서 사용)
import { useRouter } from "next/navigation";

export default function Create() {
  const router = useRouter();

  return (
    <form
      onSubmit={(e) => {
        e.preventDefault();
        const title = e.target.title.value;
        const body = e.target.body.value;
        const options = {
          method: "POST",
          headers: {
            "Content-Type": "application/json",
          },
          body: JSON.stringify({ title, body }),
        };
        fetch("http://localhost:9999/topics", options)
          .then((res) => res.json())
          .then((result) => {
            console.log(result);
            const lastid = result.id;
            router.push(`/read/${lastid}`);
          });
      }}
    >
		...
    </form>
  );
}
4. 데이터 생성 후 캐시 초기화
이전에 RootLayout에서 fetch통신으로 topics의 데이터를 받아와 링크 컴포넌트로 만들었다.
export default async function RootLayout({ children }) {
  const res = await fetch("http://localhost:9999/topics");
  const topics = await res.json();

  return (
    <html lang="en">
      <body>
        <h1>
          <Link href="/">WEB</Link>
        </h1>
        <ol>
          {topics.map((topic) => (
            <li key={topic.id}>
              <Link href={`/read/${topic.id}`}>{topic.title}</Link>
            </li>
          ))}
        </ol>
        {children}
        <Control />
      </body>
    </html>
  );
}
그런데 데이터를 생성한 후 read 페이지로 전환이 되면 글 내용은 보이지만 글 목록에는 추가가 되지 않았다.
next.js는 기본적으로 한 번 가져온 정보를 .next 폴더의 cache에 저장한다.
페이지에 접속하면 터미널에 cache 사용여부에 대한 표시가 뜬다. <- 강의에서는 vs code의 터미널에서 확인이 가능했는데 난 뜨지 않는다...ㅜ

- cache: MISS -> 캐시를 사용하지 않음
- cache: HIT -> 캐시를 사용함
페이지에 처음 접속하면 데이터 요청을 보내고 받아온 데이터를 저장한다.
이 때는 캐시에 데이터를 저장만 하기 때문에 MISS인 상태이다.
방문했던 페이지에 재접속하면 cache: HIT이 표시된다.

이때 서버측 터미널을 보면 통신 기록이 남아있지 않다.
=> 서버와의 통신 없이 데이터를 cache에서 가져옴
따라서 데이터를 생성해도 글 목록에는 이전에 받아온 데이터가 표시된다.
이를 해결하기 위해 캐시를 비우고 재생성하도록 구현한다.
router.refresh( )를 추가해 페이지 이동 후 서버 컴포넌트를 강제로 리렌더링하도록 한다.
// app/create/page.js
<form
  onSubmit={(e) => {
    e.preventDefault();
	...
    fetch("http://localhost:9999/topics", options)
      .then((res) => res.json())
      .then((result) => {
        const lastid = result.id;
        router.push(`/read/${lastid}`);
        router.refresh();
      });
  }}
>
글 목록에 표시되는 데이터는 RootLayout에서 받아오는 데이터 목록이므로 fetch 요청을 보낼때 cache에 대한 설정을 옵션에 추가해 전송한다.
- {next: {revaildate: 10}} -> 10초 동안 캐시를 유지하고 10초가 지나면 캐시를 다시 만듬
- {cache: 'no-store'} -> 데이터 캐싱 해제(캐시를 아예 만들지 않음)
// app/layout.js
const res = await fetch("http://localhost:9999/topics", {
  cache: "no-store",
});
🖥️ 데이터 수정하기
1. 버튼 컴포넌트 분리하기
update, delete 버튼을 담은 컴포넌트를 글에 접근했을 때(read 페이지)에만 나타나도록 한다.
update 버튼의 경우 해당 데이터를 수정하는 페이지로 이동을 하는 동작을 수행해야하기 때문에 id에 접근해야 한다.
하지만 RootLayout은 서버 컴포넌트이여만 하기 때문에 useParams를 사용할 수 없다.
=> 버튼을 담은 컴포넌트만 클라이언트 컴포넌트화시키기
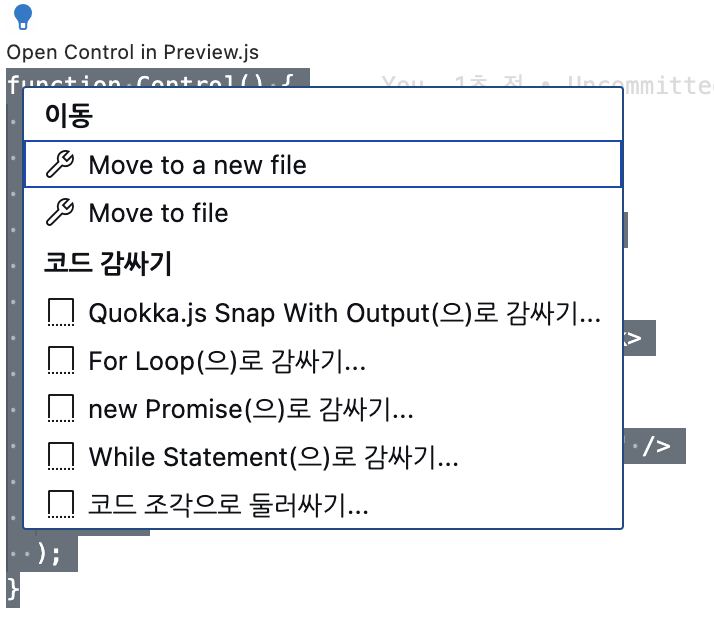
💡 Tip) 같은 파일에서 버튼 컴포넌트를 선언한 후 드래그한 다음 표시된 전구를 눌러 Move to a new file을 클릭하면 새로운 폴더에서 정의됨
// app/Control.js
"use client"

import Link from "next/link";

export function Control() {

  return (
    <ul>
      <li>
        <Link href="/create">Create</Link>
      </li>
        <li>
          <Link href={`/update/1`}>Update</Link>
        </li>
        <li>
          <input
            type="button"
            value="delete"
          />
        </li>
    </ul>
  );
}
useParams를 사용해 id에 접근하여 id의 유무에 따라 버튼 표시 여부를 설정한다.
update 버튼을 클릭하면 update 페이지로 이동하도록 id를 세그먼트로 넘겨준다.
import { useParams } from "next/navigation";

export function Control() {
  const params = useParams();
  const id = params.id;
  return (
    <ul>
      <li>
        <Link href="/create">Create</Link>
      </li>
      {id ? (
        <>
          <li>
            <Link href={`/update/${id}`}>Update</Link>
          </li>
          <li>
            <input
              type="button"
              value="delete"
            />
          </li>
        </>
      ) : null}
    </ul>
  );
}
2. update 페이지 구현하기
update 폴더를 생성하고 [id] 폴더 아래 page 파일을 만든다.
update 페이지에는 기존 글 정보를 받아와 표시한 후 수정해 다시 데이터를 생성한다.
-> read와 create 기능이 모두 필요함
UI는 create와 동일하기 때문에 가져와 사용한다.
update 페이지에 접근하면 기존의 글 데이터를 받아와 표시해야 한다.
update는 클라이언트 컴포넌트이므로 useEffect로 fetch 통신을 요청한다.
useParams로 id에 접근해 해당 id의 데이터를 요청한다.
import { useParams, useRouter } from "next/navigation";
import { useEffect } from "react";

export default function Update() {
  const router = useRouter();
  const params = useParams();
  const id = params.id;
  useEffect(() => {
    fetch(`http://localhost:9999/topics/${id}`)
      .then((res) => res.json())
      .then((result) => {
        console.log(result);
      });
  }, []);
  return (
		...
  );
}
받아온 데이터를 useState로 관리한다.
받아온 title과 body를 표시한 후 변경된 내용을 수정하도록 요청을 보낸다.
해당 데이터를 수정해야 하므로 주소 뒤에 id를 추가하고 PATCH 또는 PUT 메소드를 사용해 요청을 전송한다.
import { useParams, useRouter } from "next/navigation";
import { useEffect, useState } from "react";

export default function Update() {
  const [title, setTitle] = useState("");
  const [body, setBody] = useState("");
  const router = useRouter();
  const params = useParams();
  const id = params.id;
  useEffect(() => {
    fetch(`http://localhost:9999/topics/${id}`)
      .then((res) => res.json())
      .then((result) => {
        setTitle(result.title);
        setBody(result.body);
      });
  }, []);
  return (
    <form
      onSubmit={(e) => {
        e.preventDefault();
        const title = e.target.title.value;
        const body = e.target.body.value;
        const options = {
          method: "PATCH",
          headers: {
            "Content-Type": "application/json",
          },
          body: JSON.stringify({ title, body }),
        };
        fetch(`http://localhost:9999/topics/${id}`, options)
          .then((res) => res.json())
          .then((result) => {
            console.log(result);
            const lastid = result.id;
            router.push(`/read/${lastid}`);
            router.refresh();
          });
      }}
    >
      <p>
        <input
          type="text"
          name="title"
          placeholder="title"
          value={title}
          onChange={(e) => setTitle(e.target.value)}
        />
      </p>
      <p>
        <textarea
          name="body"
          placeholder="body"
          value={body}
          onChange={(e) => setBody(e.target.value)}
        />
      </p>
      <p>
        <input type="submit" value="update" />
      </p>
    </form>
  );
}
요청이 완료된 후 read 페이지로 리다이렉트 된다.
하지만 read 페이지에서도 캐시가 사용되기 때문에 업데이트가 반영되지 않았다.
-> read 페이지에서 fetch 요청에 옵션 추가
// app/read/[id]/page.js
const res = await fetch(`http://localhost:9999/topics/${props.params.id}`, {
  cache: "no-store",
});
🖥️ 데이터 삭제하기
delete 버튼이 클릭되면 해당 페이지의 id를 가진 글이 삭제된다.
DELETE 메소드로 삭제 요청을 보내고 요청이 완료되면 루트 페이지('/')로 이동한다.
// app/Control.js
import { useParams, useRouter } from "next/navigation";

export function Control() {
  const params = useParams();
  const router = useRouter();
  const id = params.id;
  return (
    <ul>
       ...
      {id ? (
        <>
          ...
          <li>
            <input
              type="button"
              value="delete"
              onClick={() => {
                const options = { method: "DELETE" };
                fetch(`http://localhost:9999/topics/${id}`, options)
                  .then((res) => res.json())
                  .then((result) => {
                    router.push("/");
                    router.refresh();
                  });
              }}
            />
          </li>
        </>
      ) : null}
    </ul>
  );
}